STEP 1: Setting Up the Server
sudo apt-get update -y
sudo apt-get upgrade -y

Step 2: Install Required Dependencies
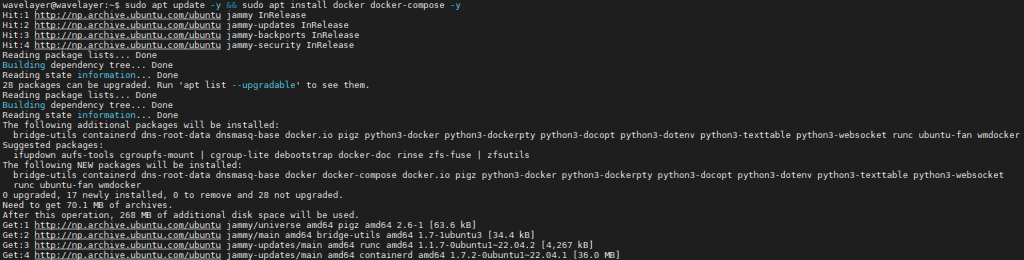
We have to set up both Docker & Docker-compose. For both installation at once, you use the given command:
sudo apt update -y && apt install docker docker-compose -y
Now, if you wish to run Electrum’s personal server and Electrum for distinct systems, like a VPS, you should install Tor on both. This ensures that your IP address cannot be linked back to your BTC address, hence protecting your anonymity.
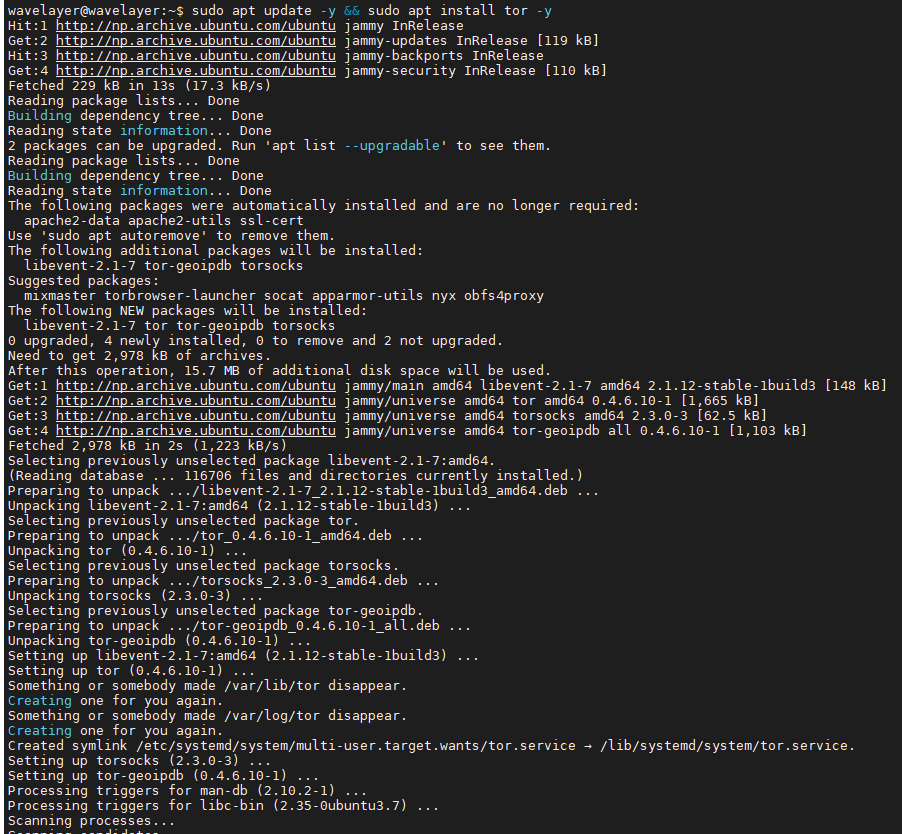
To set up Tor, run the following commands on both machines:
sudo apt update -y && sudo apt install tor -y
If you’re not logged in as the root user, you must add your user to the tor or debian-tor group, then relog.
sudo usermod -aG debian-tor wavelayer

Step 3: Install Dockerized Electrum Personal Server
Now we may proceed to the EPS set up and configuration. To accomplish this, download the dockerized EPS repo with this command:
sudo git clone https://github.com/BitLaunchIO/docker-electrum-personal-server.git

If you will be using tor, transfer the torc configuration file located in the repo to /etc/tor/torrc and enable connecting to the EPS via tor on your docker-eps host system:
sudo cp docker-electrum-personal-server/torrc /etc/tor/torrc

Restart the tor service with:
sudo systemctl restart tor

You’all also need to create a torcc file on your electrum client machine if you’ll be using Tor.
cd docker-electrum-personal-server
sudo vi /etc/tor/torcc
Replace the content as follow:
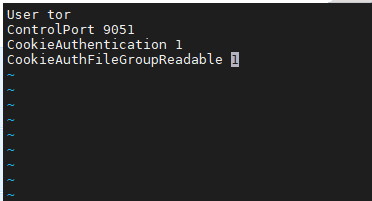
Save and restart the tor on client machine.
sudo systemctl restart tor
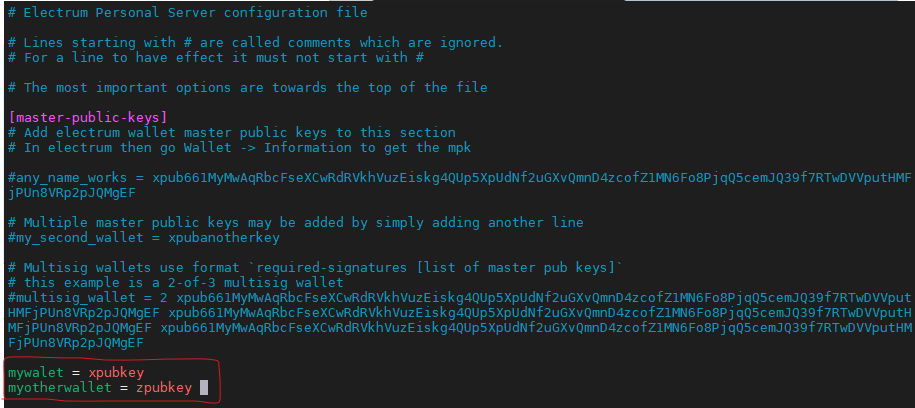
Configuring your Electrum Personal Server
After you’ve configured Tor, you’ll need to add the public Electrum wallet credentials to the config.ini file for your electrum server host. This will enable Eps to scan for transactions and locate your address.
Change the config file with:
sudo vi docker-electrum-personal-server/config.ini
Save the file. You must now change your bitcoin.conf file to include the necessary tor nodes for blockchain synchronization. Edit the configuration with:
sudo vi docker-electrum-personal-server/bitcoin/bitcoin.conf
Get the addresses of some onion nodes from Google or the wiki and put them into your configuration with the following format:
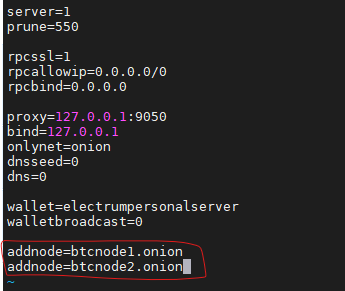
Replace the btcnode1.onion, with valid node address.
Step 4: Starting Your Containers
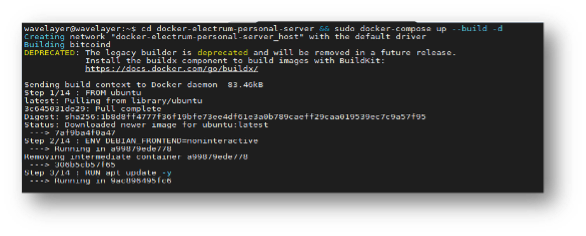
After configuring and initializing the containers, the following step is to start them. Bitcoin Core must first synchronize the blockchain, which might take days or even weeks depending on internet bandwidth and hardware capabilities. Even in pruned mode, the whole blockchain must be downloaded before removing unneeded blocks. Using a Virtual Private Server (VPS) with continuous uptime and high-speed internet makes this procedure easier, but it is possible on a home server with patience. To start the container, run the supplied command:
cd docker-eps && docker-compose up --build -d
Once everything is in sync, you must establish a wallet on your docker-eps host server. This allows Electrum Personal Server to import your Electrum addresses and check for incoming transactions. For this, execute the given command:
docker exec -t docker-eps_bitcoind_1 bitcoin-cli createwallet electrumpersonalserver

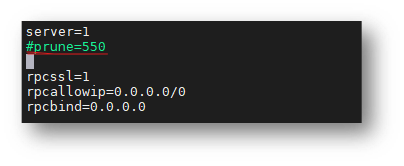
If your wallet contains old transactions, EPS will need to rescan them, which necessitates disabling pruning. Edit your bitcoin.conf file with the following command:
sudo vi docker-electrum-personal-server/bitcoin/bitcoin.conf
Find the line that starts prune=550 and add a # before it to comment it out.
Save your document and then edit the Dockerfile.eps by running:
sudo vi docker-electrum-personal-server/Dockerfile.eps
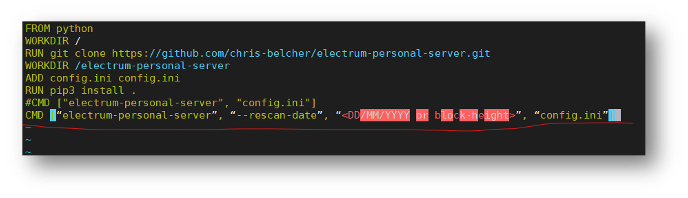
Once the scan is finished, you should undo any modifications to both files and continue using them as usual.
Connecting Electrum to Your Electrum Personal Server
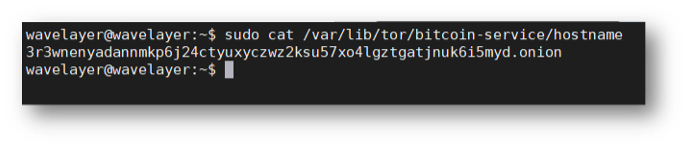
We can connect to our Electrum Personal Server now that it is up and running. However, we must first locate the onion address (if using the tor service):
sudo cat /var/lib/tor/bitcoin-service/hostname
When starting Electrum, use following command:
For a local install:
electrum –oneserver –server 127.0.0.1:50002:s
If you’re running on a two different machine:
electrum –oneserver –server myeps.onion:57283:s -p socks5:127.0.0.1:9050
(Replace myeps.onion with your onion address of electrum server).
Conclusion
In conclusion, using the electrum personal server you can improve security of your bitcoin wallet. With the docker, you can deploy the server easily, ensuring control over transaction data while maintaining confidentiality and security.